DIY Cloud-based workstation
Running your local development workloads in the cloud. This blog explains why you might want to, what to consider, and how to do it securely.
April 1, 2017
I’m lucky enough to own a top-of-the-line 15" MacBook Pro which has more than enough horsepower for whatever I need to do, and even my ‘old’ machine, a 2014 15" MacBook Pro, would still be perfectly good for whatever I need to do. Yet, in the past few weeks I’ve started to explore options for having a cloud-based workstation.
Why do I need this?
Maybe you don’t. And I’m certainly not going to debate the benefits of having a powerful machine. But maybe you’re a consultant and your client has a policy that doesn’t allow you to have their code on your machine. Or you have multiple clients and their code cannot be on the same machine (and you don’t want to buy yet another MacBook Pro). Or maybe you fly often and a 15" MacBook Pro is just inconvenient, or you don’t want airport security to pry into your precious source code. Or you’re a cyclist, and want to have an option to pack light instead of riding to the office with a 15" MacBook Pro strapped to your back.
I don’t technically need this, but I do like the idea of being able to fly abroad with a small MacBook that has nothing on it other than iTerm2 and Chrome. I also like the idea of being able to switch my 15" MacBook Pro for something smaller when I’m commuting by bike. Or leaving my MacBook Pro at my desk and taking my iPad into a meeting and still do some coding if I have to.
Limitations
The obvious primary limitation of a cloud-based workstation is that you need to have an internet connection to use it. Duh. But a another limitation, at least with my setup, is that you’re limited to using text-based tools. If you spend most of your time in a graphical IDE, this setup is probably not for you. If you spend 99% of your time in either a browser or a terminal, this setup can definitely work for you.
Security
One of the big benefits of local development is that you can basically do whatever you like. Spin up virtual machines, containers, or app servers, bind ports on your laptop and access your stuff through the browser. No annoying firewalls in between, and no sysadmin telling you what you can or cannot do. And that’s mostly fine on a secure, trusted network. But doing a quick network scan at a conference, at an airport, or at your local coffee place quickly proves why we would be very, very stupid if we were just going to get a VM and tie it to the public internet. But we still don’t want to mess with firewalls too much, right? Well, in that case we need to make sure that our cloud-based workstation runs on a secure, trusted network that only we can access.
Another thing is disk encryption. Some cloud providers are rather lazy when it comes to scrubbing used storage, in which case you can find/recover some interesting stuff when running data recovery or forensics tools on a fresh cloud instance. Generally speaking: if you don’t own the physical disk, always encrypt whatever you store on it.
My initial setup
Yesterday, I built my initial cloud-based workstation setup, on AWS.

The setup
- a VPC (subnet 10.1.0.0/16) with:
- a public subnet (10.1.11.0/24, instances will also get a public IP)
- a private subnet (10.1.21.0/24)
- a NAT gateway in the public subnet (so nodes in the private subnet can access the internet)
- Internal DNS zone (using Route53): cloud.int
- 2 EC2 instances:
- VPN/Bastion instance: a small instance that acts as an SSH bastion (I might add an OpenVPN server later) in the public subnet
- Devbox: the actual workstation, sized according to what I need, running in the private subnet, and only accessible from the VPN/Bastion instance. It has 2 internal DNS records:
devbox.cloud.int(A record)*.devbox.cloud.int(CNAME record todevbox.cloud.intfor running webservers with name-based vhosts)
Both EC2 instances are running Debian Jessie at this point, but you can obviously choose whatever Linux distribution you like.
Access
- The VPN/Bastion instance is accessible from anywhere, but only via SSH with key-based authentication
- The Devbox is accessible only from the VPN/Bastion instance, but other than that no ports are blocked.
Automation
To set up this environment, I use Terraform, which means I can spin up a fresh environment with a single terraform apply.
NOTE: I’m not sharing my code at this point as the initial setup contains some configuration that is specific to my needs. If I keep using cloud-based workstations, I will probably change the code a bit (make it more modular) and then open-source a generic version.
Working with my cloud-based workstation
So how do I currently use my cloud-based workstation? And is the experience vastly different from running everything locally?
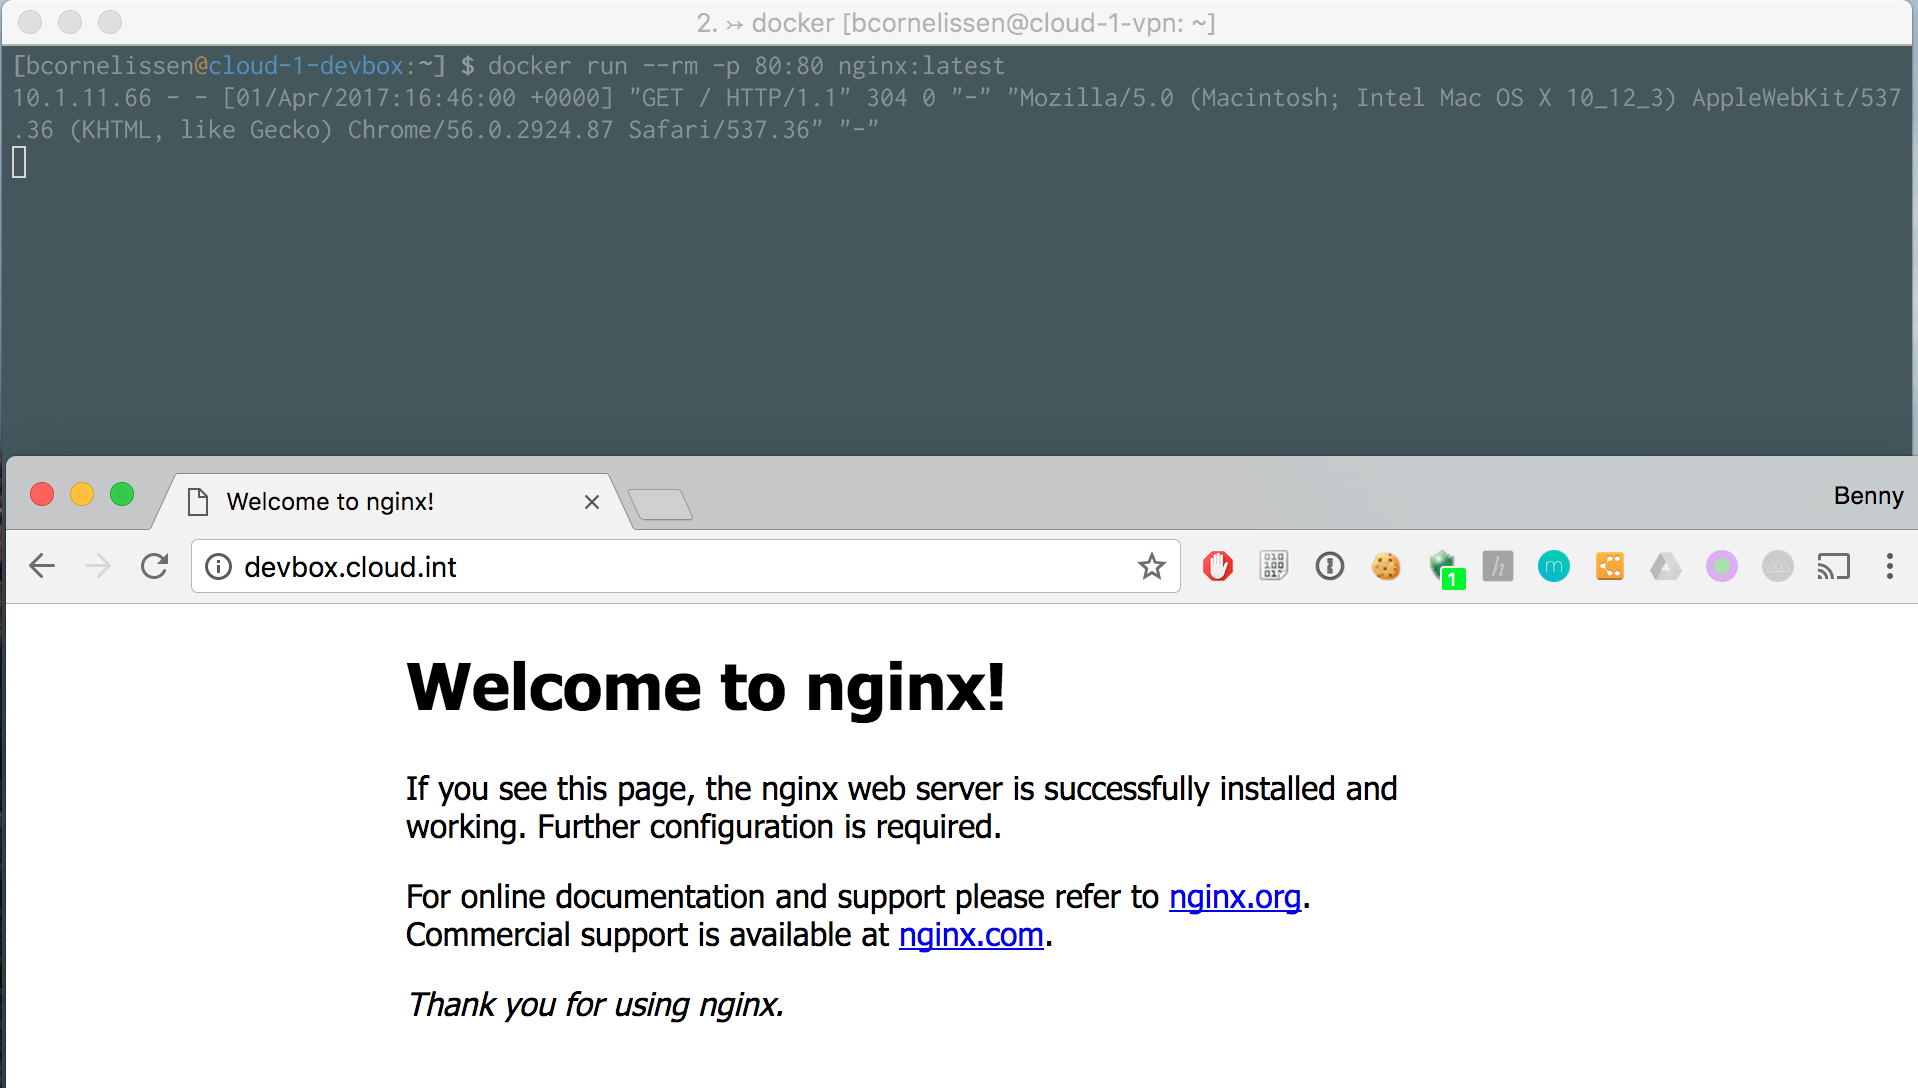
Well, my workflow isn’t radically different from working locally. I have my dotfiles on the Devbox, so my command line is the same, my Vim setup is the same, and I have all the tools I have on my Mac. Docker is now running natively instead of in a VM, which is nice. But obviously I can’t readily access an Nginx container from the browser on my laptop. And working over an SSH connection means you have to deal with potential connection issues, and if you also want to work in multiple terminal windows, there’s pretty much no getting around Tmux.
There are 2 key ingredients to making this experience nearly seamless:
- Switchy Omega: This is a plugin I use in Chrome to set up proxying. It can switch between multiple proxies, read pac files, and can even run switch between profiles based on URL matches.
- iTerm2: iTerm2 might be the very best terminal app for macOS. Next to handy things like split-screen and broadcasting keyboard input to multiple terminals, the killer feature for our cloud-based workstation is that it ships with Tmux integration.
Getting in
To get going, here’s what I do:
- SSH into the bastion:
ssh -D22224 myuser@mybastion
The-D22224creates a SOCKS5 proxy onlocalhost:22224that we will use with Switchy Omega later - SSH into the Devbox:
ssh myuser@devbox.cloud.int - Start a Tmux session in Control Mode:
tmux -CCUsing Control Mode (using-CC) enables the tmux integration of iTerm. This means you don’t have to mess around with difficult Tmux keybinds, but can just open tabs and windows and iTerm will handle the Tmux stuff behind the scenes. - If we lose our connection, or want to pick up where we left of from another machine, we simply repeat steps 1 and 2. But instead of starting a Tmux session, we attach the existing one:
tmux -CC attachThis immediately (re)opens all tabs/windows associated with that session, and you can pick up where you left off. Another nice thing, is that if you have the Tmux session attached on multiple systems (your desktop and your small laptop) Tmux will resize to match the smallest ‘viewport’. So you won’t have to worry when switching from the 4K monitor on your desk to your 11" MacBook Air with a measily 1366x768 pixels.
Using my browser
Suppose we’re running a web app on our Devbox, and we want to use our local browser to view it. How do we do that?
- Make sure you have Switchy Omega installed inside Chrome
- Open Switchy Omega’s Options panel and add a proxy profile in Switchy Omega
- Name: cloud-int
- Protocol: SOCKS5
- Server: localhost
- Port: 22224
- In the ‘Auto Switch’ Profile, add a condition:
- Type: Host wildcard
- Details:
*.cloud.int - Profile: cloud-int
If we’re now connected as described above, and Switchy Omega is set to the Auto Switch profile, all we need to do is point our browser to http://devbox.cloud.int/ and your web app will show.
Using my iPad
On my iPad I use Prompt to do some occasional SSH’ing. While it’s one of the best iOS apps for SSH available, I don’t feel any urge do use it for more than the quick occasional edit, but it can come in handy when you need to quickly help out a colleague when you’re stuck in a meeting. However, with a lack of window management, and with Prompt not having a iTerm-like tmux integration, how does that work?
The answer is: just like regular tmux would.
Say we’re having a few windows open on our Mac, in a tmux session on our cloud-based workstation, like the screenshot below:
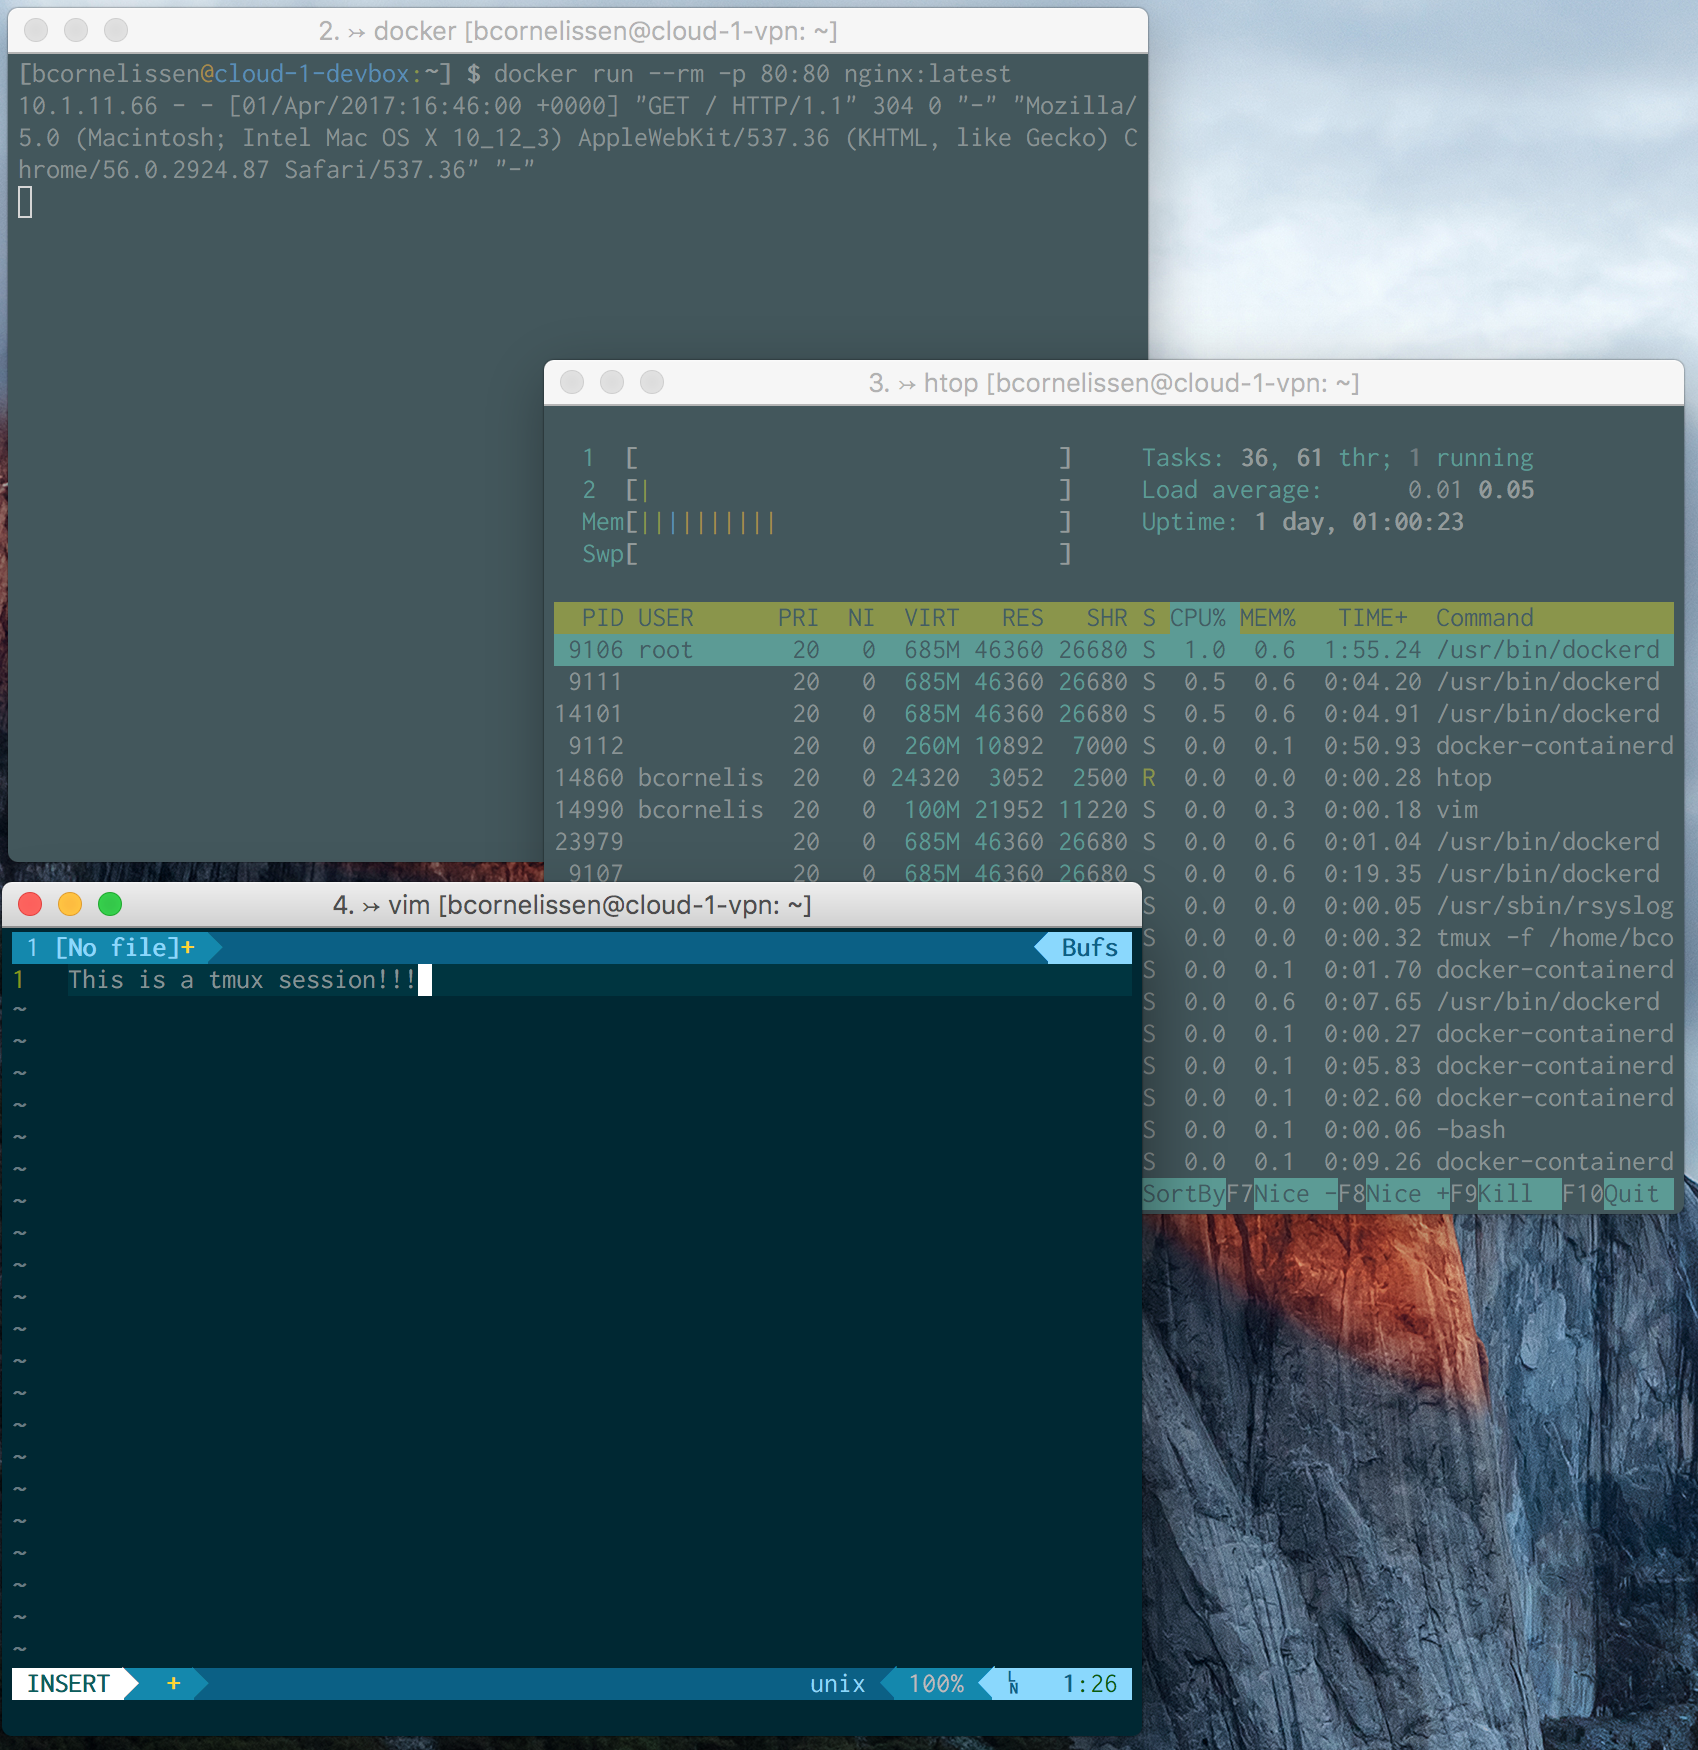
If we would want to attach that session from our iPad, that would work like this:
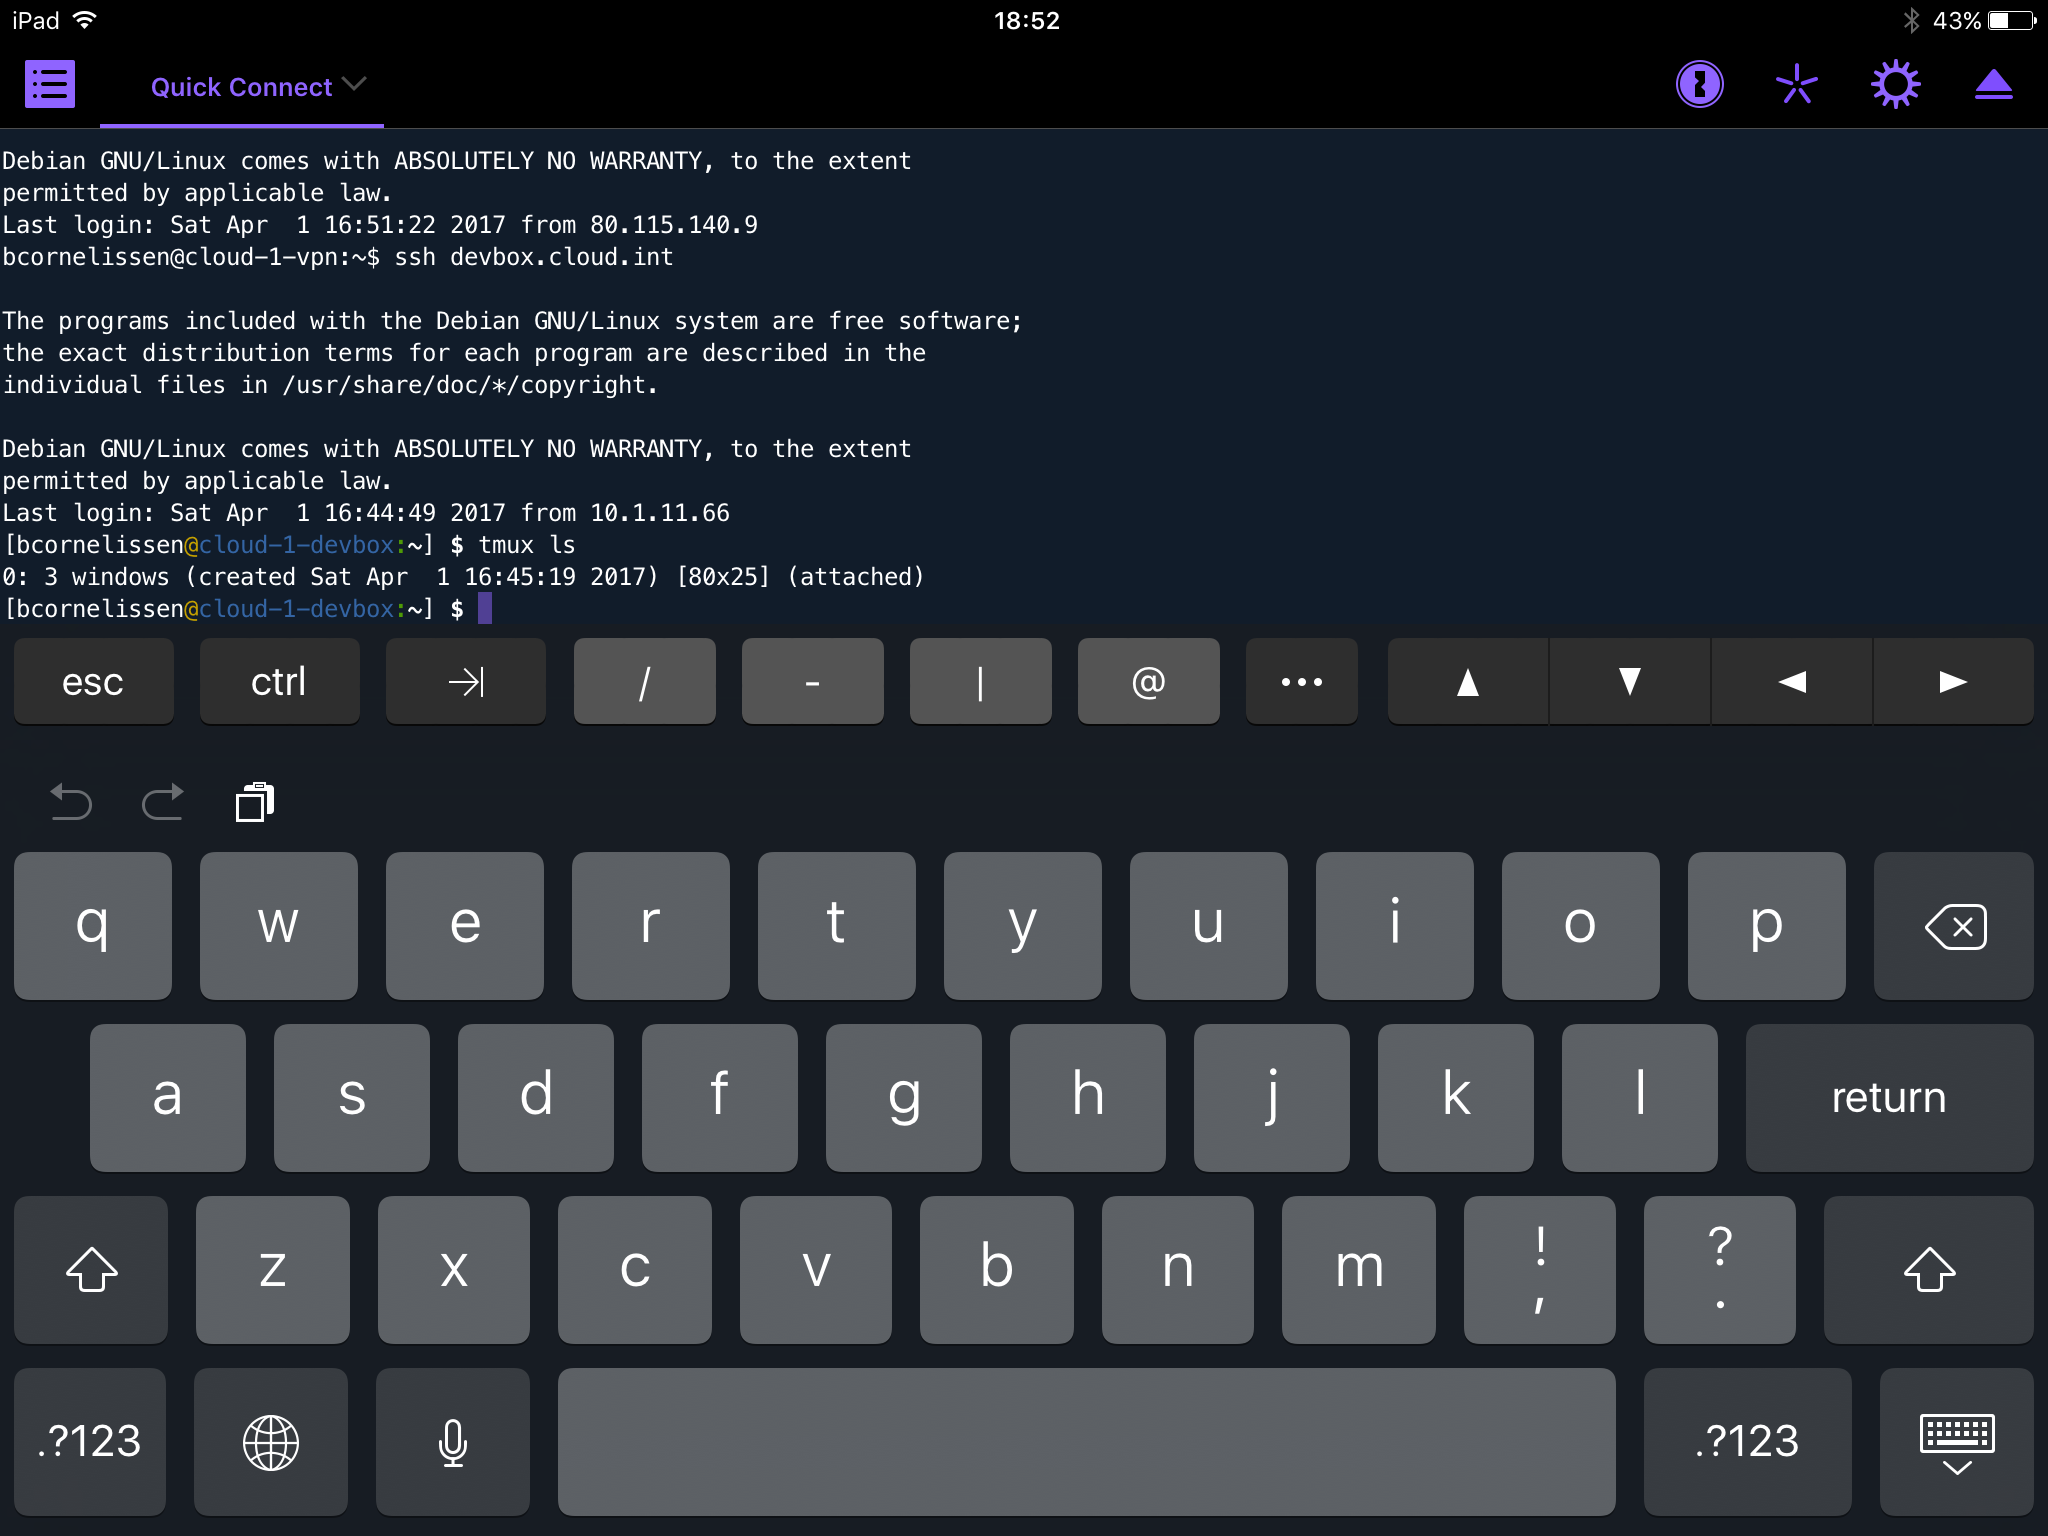
- SSH into the bastion
- SSH into the devbox
- Run
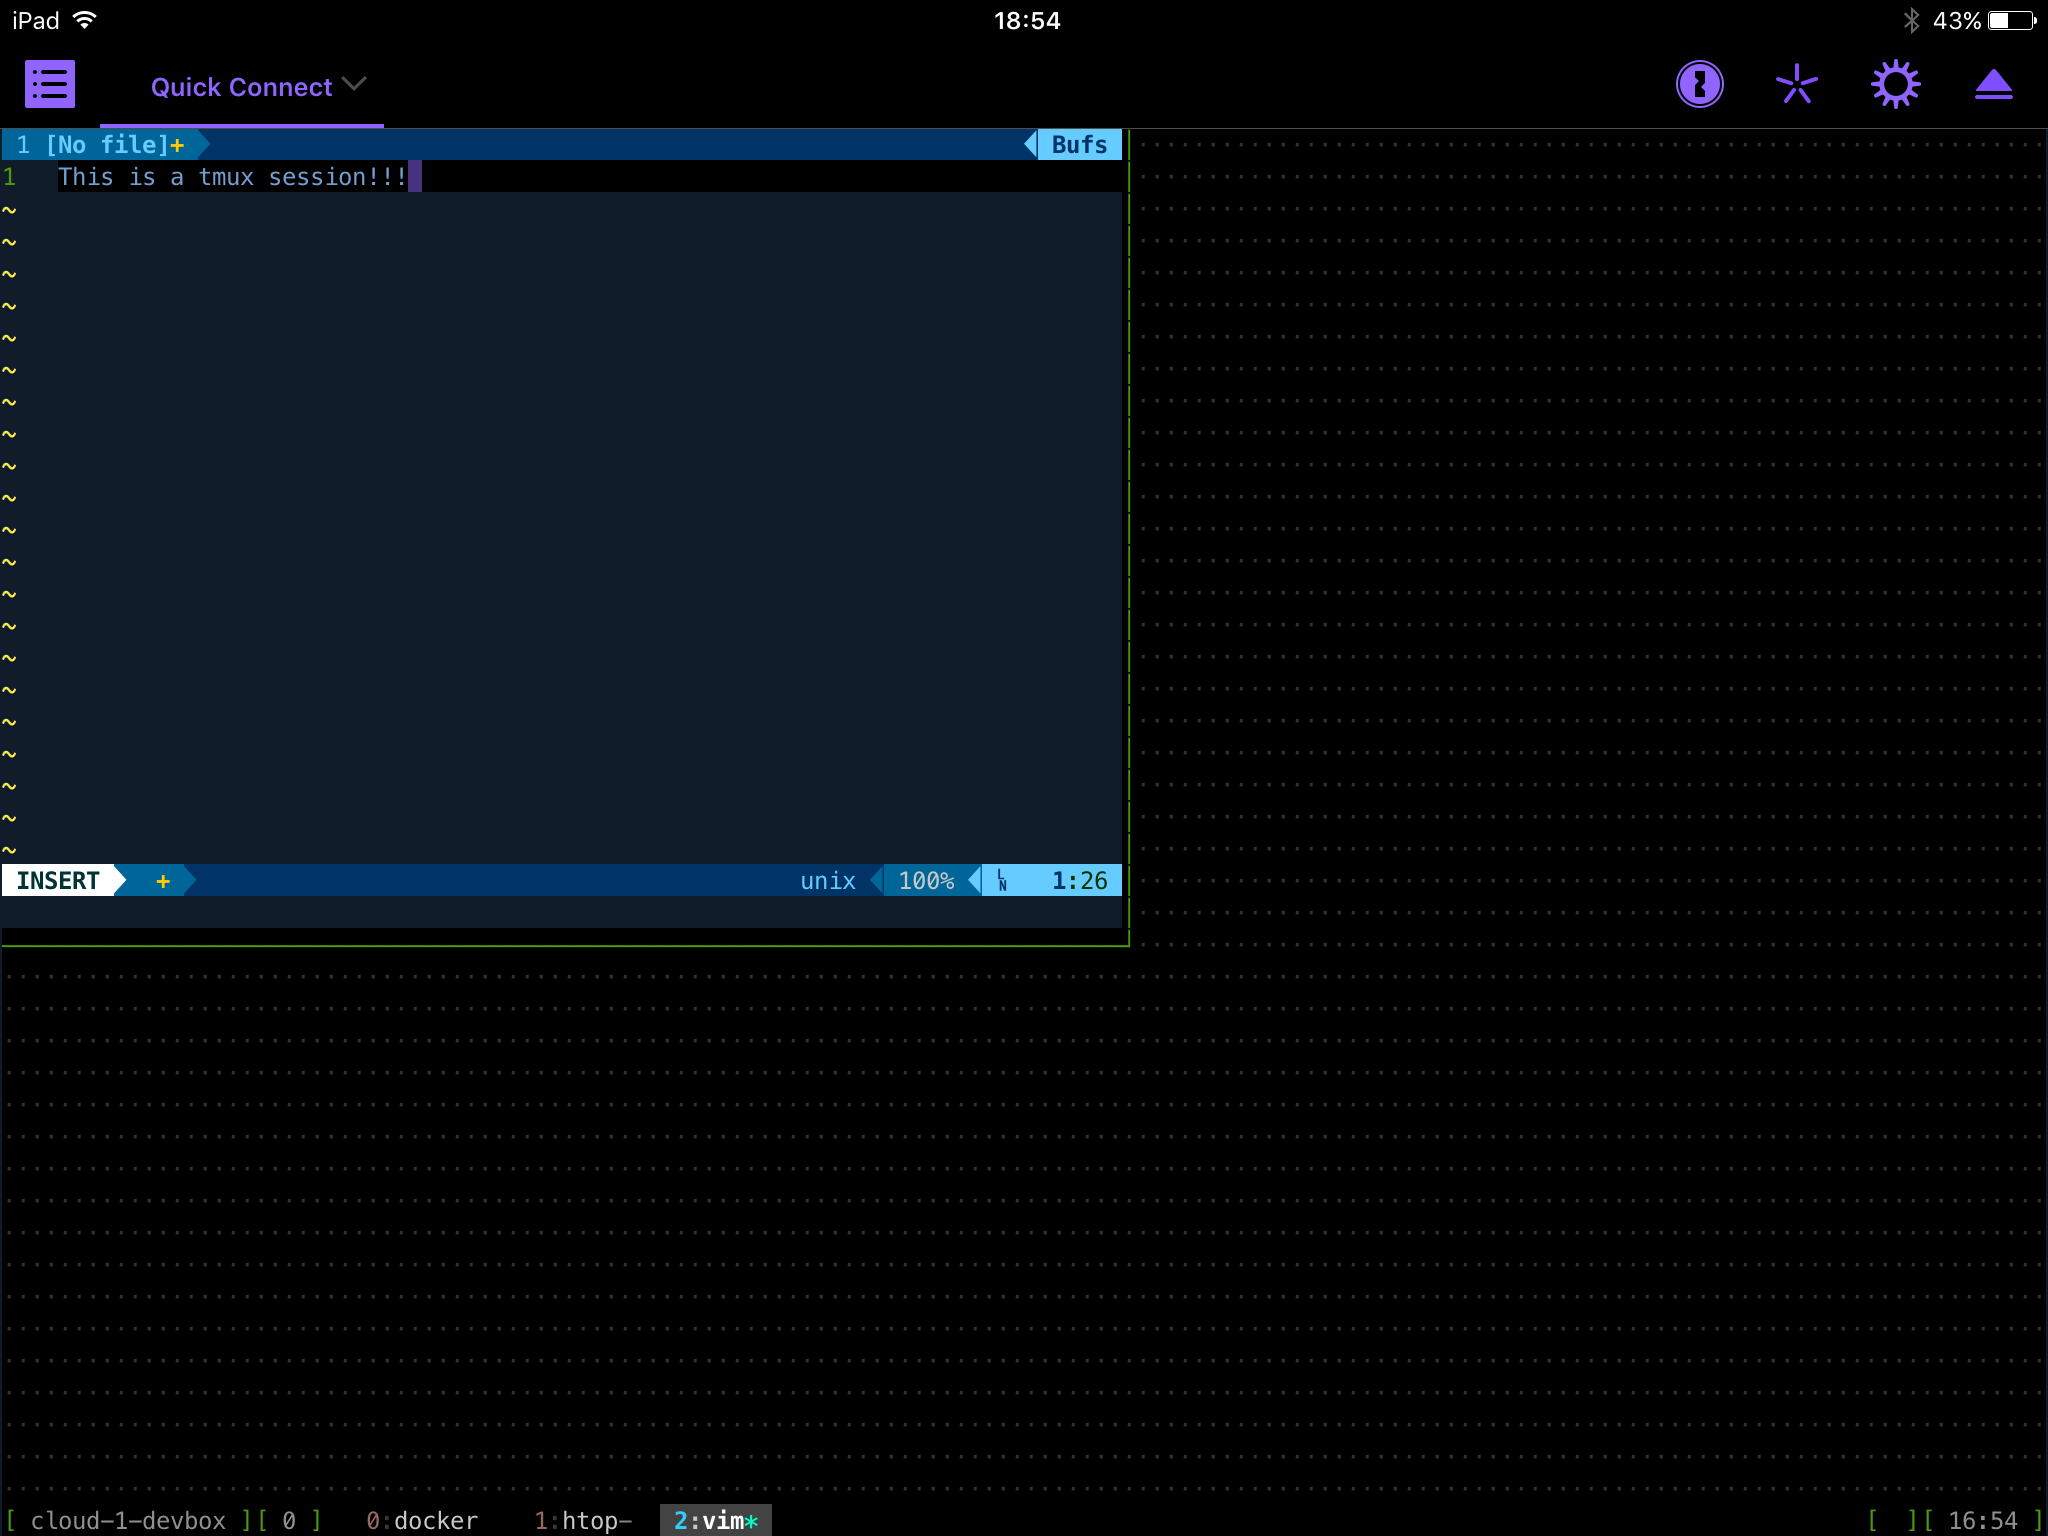
tmux lsto find the session ID (in this case it’s0) - Attach the session:
tmux attach -t 0
What’s next?
So, as you can see, the setup seems to work. So what’s next? Well, I’m going to do some more testing over the coming weeks. Adapt my setup where needed. Maybe swap the bastion for an OpenVPN server so the fiddling with Switchy Omega goes away. Leave my 15" MacBook Pro at home more often and take my lighter, smaller, and slower MacBook with me instead. Maybe test how this setup behaves over poor connectivity (mobile, office Wifi, etc).
To be continued…